
If you're looking to accept donations on your Drupal site, the combination of the Webform module and Stripe provides a flexible and powerful solution. In this guide, I’ll walk you through setting up a donation form using the Webform, Stripe, and Stripe Webform Integration modules—all on a local Drupal environment using DDEV.
Prerequisites
Before jumping in, make sure you have the following:
- A Stripe account with development sandbox access.
- A local Drupal environment (I recommend DDEV).
- Basic knowledge of Drupal module installation and Webform configuration is helpful.
💡 Need help setting up Drupal locally? Check out my post here for a quick setup guide with DDEV.
Step 1: Grab Your Stripe API Keys
You’ll need your Stripe Publishable and Secret API keys to connect your Drupal site to Stripe. Here's how to find them:
Log in to your Stripe Dashboard.
Image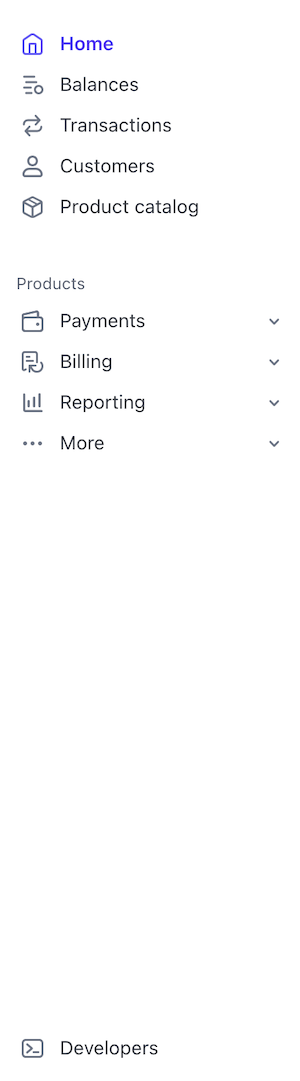
At the bottom of the left-hand sidebar, click on Developers.
Image
At the top of the Developer tools page, click on API Keys.
Image
Copy the Publishable key and Secret key from the page. You’ll use these in your Drupal configuration.
Image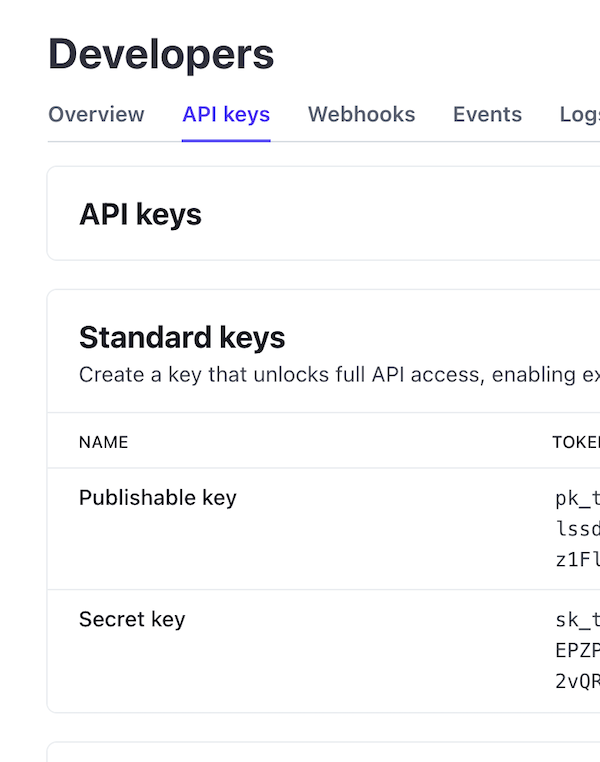
Step 2: Set Up Drupal with Required Modules
In your DDEV project directory, run the following command to install the necessary modules:
ddev composer require drupal/webform drupal/stripe drupal/stripe_webform💡 Quick Tip: The stripe_webform module already declares both stripe and webform as dependencies. So if you're starting from scratch, you can simply run:
ddev composer require drupal/stripe_webformThis will pull in everything you need in one go—no need to require the other modules separately. - Thanks for the tip Mandclu!
Once installed, enable the modules:
- Webform
- Webform UI
- Stripe
- Stripe's Webform Integration
You can do this via the Drupal admin interface or by using Drush:
ddev drush en webform webform_ui stripe stripe_webform -yStep 3: Configure Stripe in Drupal
- Go to:
/admin/config/system/stripe Enter the Publishable and Secret API keys you copied earlier.
Image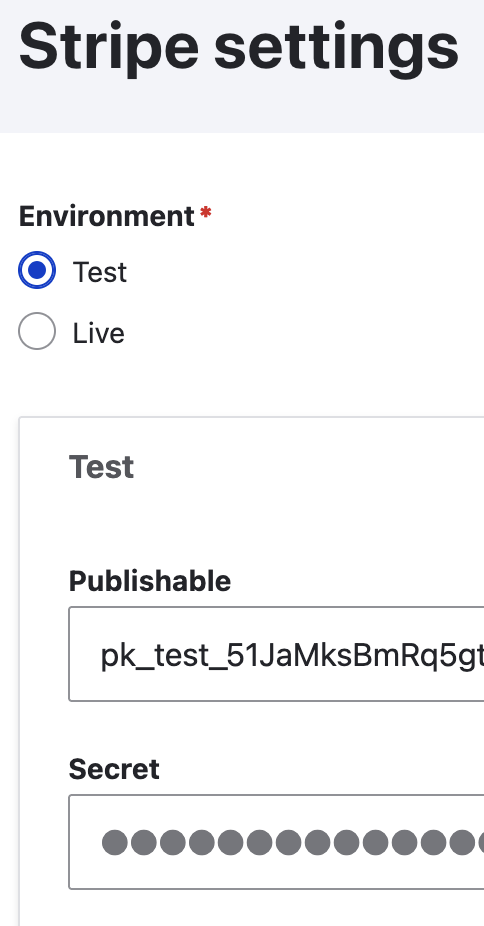
- Save the configuration.
Step 4: Create Your Donation Webform
Now we’ll create a Webform that includes donor information and connects to Stripe for payments.
- Navigate to:
/admin/structure/webform - Click Add Webform
- Add fields to collect:
- Name (composite element)
- Address (composite element)
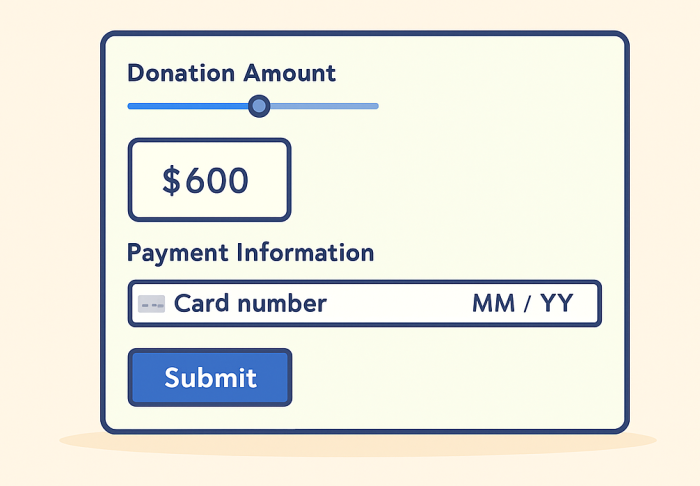
Donation Amount (number or select element)
Image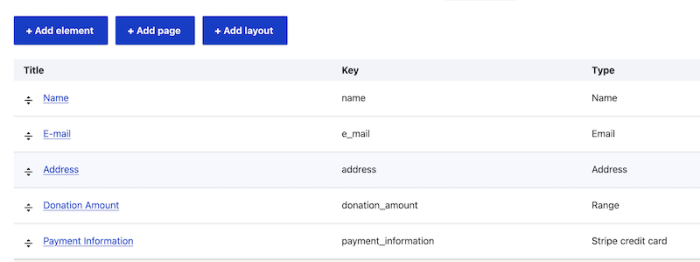
- Add the Stripe Credit Card element to your form.
Step 5: Map Submission Data to Stripe Form Element Fields
To pass values like the donor’s name and amount to Stripe, use Webform tokens in the Stripe Credit Card field settings.
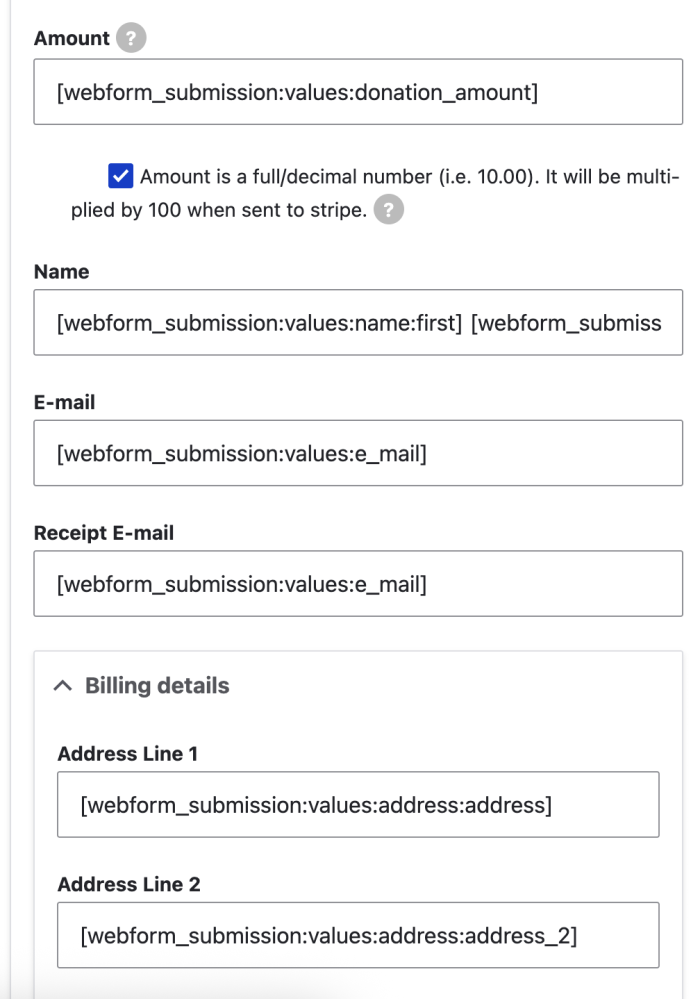
Here are some commonly used tokens:
- Amount:
[webform_submission:values:donation_amount] - Donor Name:
[webform_submission:values:name:first] [webform_submission:values:name:last] - Address Fields:
[webform_submission:values:address:address][webform_submission:values:address:address_2][webform_submission:values:address:city][webform_submission:values:address:state_province][webform_submission:values:address:postal_code]
⚠️ I had some issues getting the correct token for country code to send to stripe so I left that field blank in the Stripe field config.
Done!
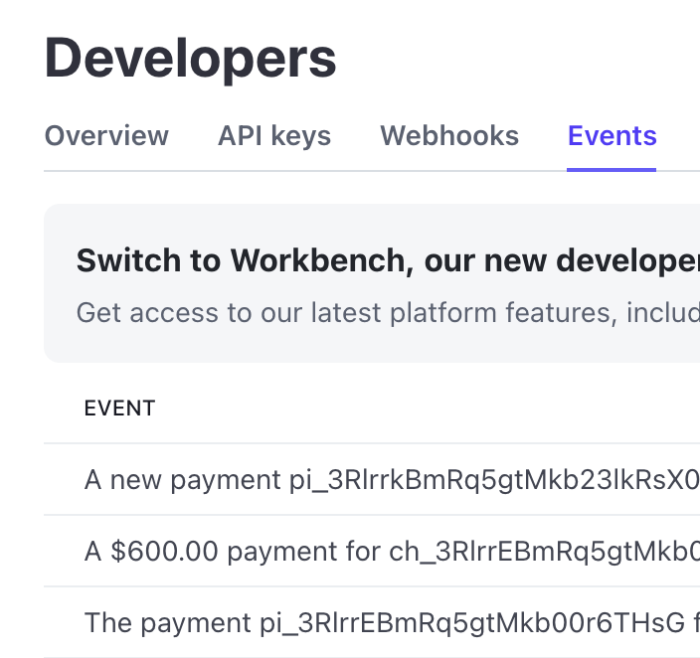
Once configured, test your form using Stripe’s test card numbers (e.g. 4242 4242 4242 4242 with any future exp date and CVV) and monitor the submission flow. If all goes well, you’ll see transactions show up in your Stripe Developer Events tab.
🚀 Ready to go live? Just switch your API keys to the live version and you’re ready to accept real donations.
Looking Ahead: A Drupal Recipe is on the Horizon
While the steps above walk you through manually configuring a Stripe-enabled donation form, there's an emerging Drupal Recipe that may soon streamline this process. The Stripe Donation Drupal recipe aims to provide a preconfigured setup to quickly get a donation form up and running using Stripe and Webform. As of now, it doesn’t have an official release, but it looks very promising for simplifying the steps outlined above.
👉 Update: An alpha release is available for the Stripe Donation Form recipe—I have installed it following the directions on the recipe page above.
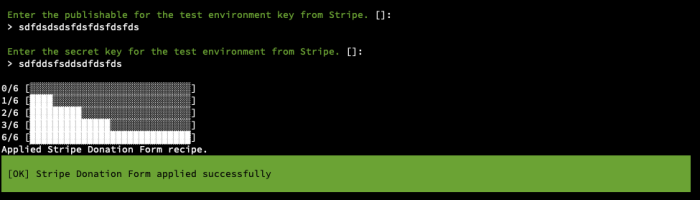
Once installed it does everything this step by step guide does!
Final Thoughts
Combining Drupal, Webform, and Stripe makes it easy to build donation (or other payment) forms tailored to your needs. Whether you’re running a nonprofit or simply collecting payments, this integration offers flexibility, security, and a smooth user experience.
Have questions or want to extend the form further? Let me know on social media or reach out!