
Command Line
We will work mostly on the command line for this training to install and enable modules, as well as importing and exporting configuration. If a task can also be done via the Drupal UI I will also show that. If you do not feel comfortable with the Command Line or have questions on it’s use for this training.
Local Setup
If you would like to follow along with the live demo portion of the training you will need a local development environment setup. It doesn’t matter what kind of local setup you have (lando, DDEV, MAMP, etc). I will be using Lando with the Drupal Recommended Project (https://github.com/drupal/recommended-project).
Below I have included my basic setup steps. Feel free to follow them or use your own or just follow along with the screen share. This is not required to participate in the training.
- Create temporary directory (I called my startup)
mkdir startup- Cd into directory
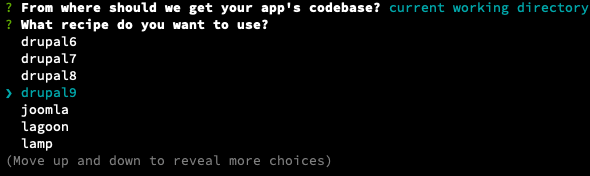
cd startup- Initiate a Lando environment. Assuming you already have lando installed, if not go to https://docs.lando.dev/basics/installation.html. The below will prompt you to set up your local work through the prompts.
lando init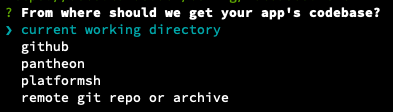


- Start Lando
lando start- Run the composer command to install Drupal Recommended Project. Note: my_site_name_dir can be whatever you want your directory name to be.
lando composer create-project drupal/recommended-project my_site_name_dir- Stop lando
lando stop- Move your working directory (if you want). Step one would be to move .lando.yml into new my_site_name_dir from above.
mv .lando.yml my_site_name_dirThen let’s move our working directory up one (or wherever you want)
mv my_site_name_dir ../Check to make sure no other files are in the startup dir
cd ../Then remove your startup directory
rm -rf startupYou should now have your my_site_name_dir where you want it.
- Let’s get our local up and running and install Drupal
cd my_site_name_dir

lando start
After Lando starts you should see the following.

Go to the URL provided for your local setup and go through the Drupal Install. Note: Using the Standard Drupal install profile at setup is fine for this training.
For more information on installing Drupal via composer, check out the drupal.org documentation.
Let's Play with Config Mangagment & Config Split
Configuration Management
- Let’s start by getting familiar with the Configuration Management user interface (UI) and the features that come form Drupal core.
- Review the Drupal Core UI for Configuration Sync / Import / Export found at /admin/config/development/configuration
- We are going to configure our site to use Configuration Management
- Change the default location for configuration storage in your sites settings.php file.
$settings['config_sync_directory'] = '../config/common';- The above directory doesn’t exist so we will have to make it.
mkdir config

cd config

mkdir common- Test our first export
lando drush cex Or the full command
lando drush config-export- Let’s play with Configuration Export and Import
- Export Configuration
- We are going to show this by installing our favorite module Admin Toolbar
lando composer require drupal/admin_toolbar

lando drush en admin_toolbar- We will show the basic changes in the Drupal UI
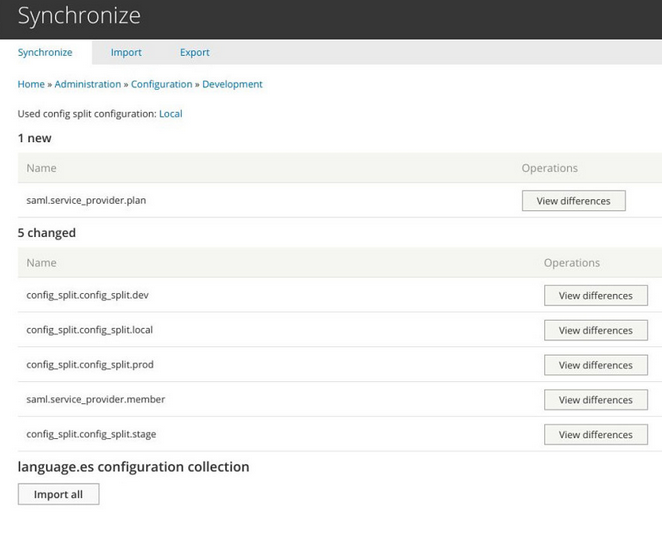
- Look at /admin/config/development/configuration and view differences in the config.
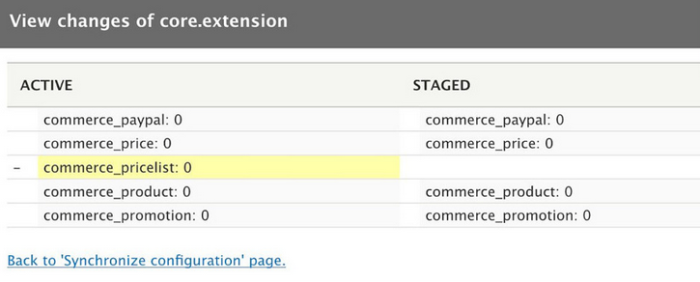
- Above is an example of a config change. Review Active vs Staged Configuration.
- Let's export the current configuration (with the command above)
- Let's Import Configuration
- Now that we have our exported configuration make some changes and import configuration instead.
lando drush cim Or
lando drush config-importNotice how your changes get reverted after the import.
Config Split
- Let’s start off by installing and enabling the Config Split Module.
lando composer require drupal/config_split

lando drush en config_split- Now we need to set up some folders to store our split configuration in.
cd config/

mkdir prod

mkdir dev
Using the Drupal UI we can configure our splits
Image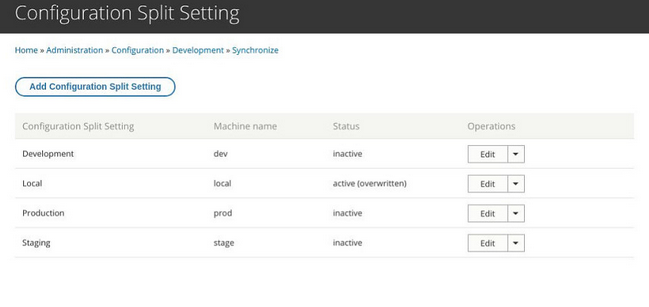 Image
Image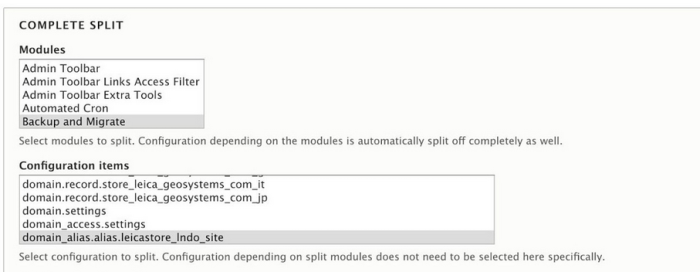 Image
Image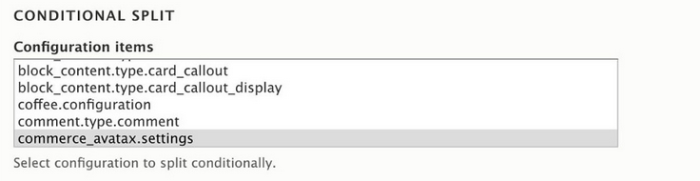
- After you have setup your split we can enable our Dev split with the following in our settings.php file
$config['config_split.config_split.my_split']['status'] = TRUE;You should setup one of the above for each split you have. Note only one should be enabled (TURE) at a time.
- To switch between splits you can set the desired split to TRUE in your settings.php file. After changing the settings in settings.php be sure to do the following.
lando drush cr && lando drush cimOr
lando drush cache:rebuild && lando drush config-import- Now you can play with Config Split Try the following.
- Add a Conditional Split for system.site
- Now update your Site Name
- Add a Complete Split for the Devel Module
- Install Devel for the Dev Split using the following command
lando composer require drupal/develNote: Be sure to be in the split you want to add the module to. It will make your life easier.
Use Cases
The following are just some of the many use cases for Config Split.
- Setting different Google Analytics ID's for dev, stage, and prod.
- Disabling or Enabling DB Log or Sys Log depending on environment
Sometimes creating feature splits is a good idea. Feature splits can be used when features are needed for selected environments.
Image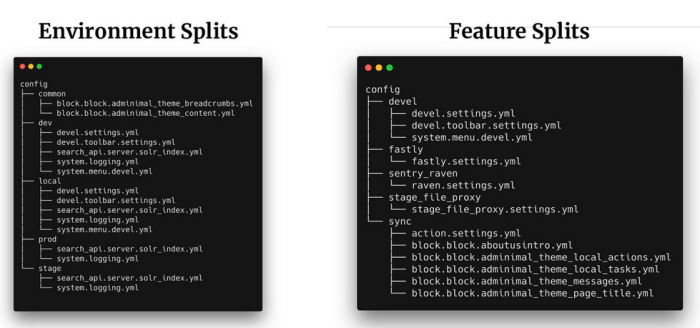 Image
Image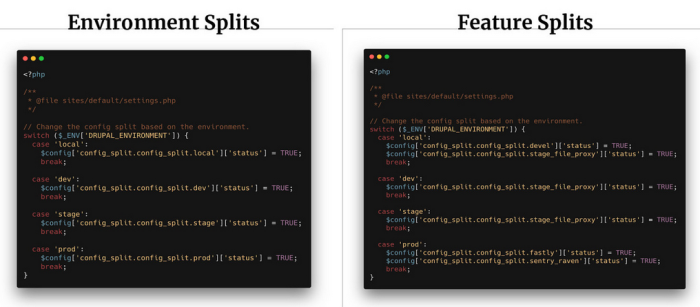
Resources
Drupal Recommended
- https://www.drupal.org/docs/develop/using-composer/using-composer-to-install-drupal-and-manage-dependencies
- https://github.com/drupal/recommended-project